Home | Projects | Notes > Real-Time Operating Systems (RTOS) > SEGGER SystemView UART-Based Recording
SEGGER SystemView UART-Based Recording
Real-Time Recording (Continuous Recording)
SEGGER SystemView supports continuous recording in three ways:
Using J-Link based debug probe
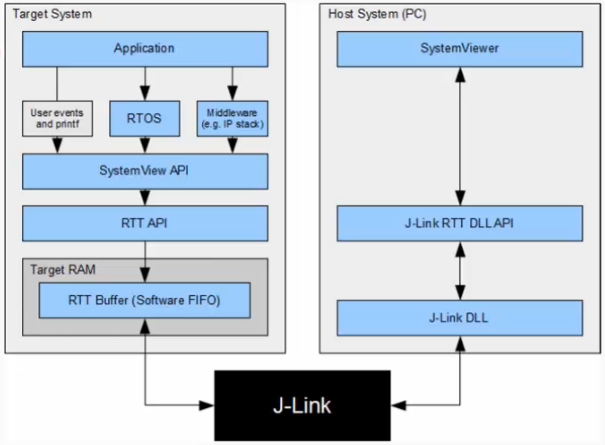
Need J-Link based debug probe
ST-Link (on-board) debug probe can also be used (ST-Link firmware must first be converted to J-Link firmware by using the ST-Link reflash utility provided by SEGGER)
However, this method has some drawbacks. Once the ST-Link is converted to J-Link firmware, we will no longer be able to debug the application using STM32 CubeIDE. So, we won't be using this method.
Using IP based communication
Using UART communication
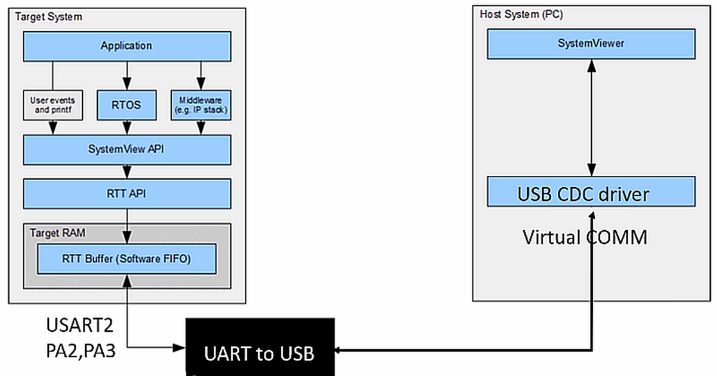
We will be using this method since it gives us the ability to do the real-time recording as well as the application debugging using STM32 CubeIDE.
SEGGER SystemView UART-Based Recording
Setup a UART-to-USB port since the host machine does not support UART communication.
Setting up the Virtual COM port (VCP) communication:
ST-LINK/V2-A (ST-LINK circuitry on STM32F407x DISCOVERY board) supports an on-board Virtual COM port on U2 pin 12 (ST-LINK_TX) and U2 pin 13 (ST-LINK_RX) but these pins are NOT connected to the USART of the STM32F407 microcontroller. This is the problem! (c.f., F446RE NUCLEO board supports on-board Virtual COM port.)
So, we need an external USB-to-UART converter module. Any USB-to-TTL Serial Converter Adapter will do.
Install the driver (https://ftdichip.com/drivers)
USB-UART module pins STM32F407x DISC board pins TX RX (PA3) RX TX (PA2) GND GND
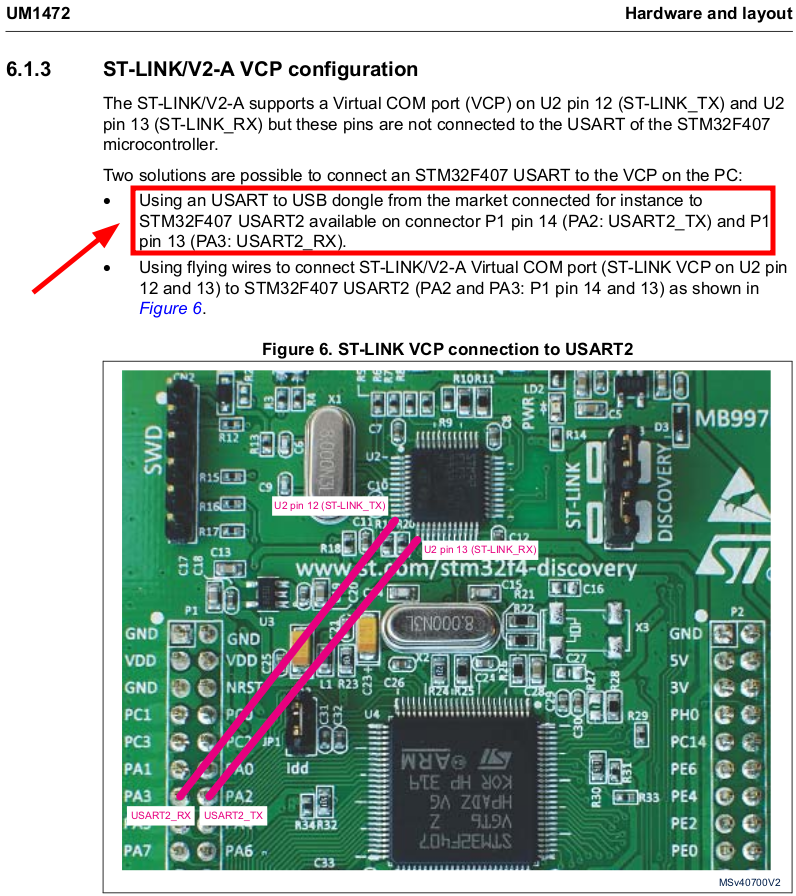
Connect the board according to the pin table mentioned above, and check the Virtual COM port the serial device is connected to by using
dmesgcommand orwatch tail /var/log/syslog.In my environment
Create a
Project/ThirdParty/Rec/folder, and importsegger_uart.cfile provided by the lecture into the folder. This is the file is used to enable the UART-based real-time recording.In the
Project/ThirdParty/SEGGER/Config/SEGGER_SYSVIEW_Conf.hfile, add the following code:xxxxxxxxxx121/* SEGGER_SYSVIEW_Conf.h */2/*********************************************************************3* TODO: Add your defines here. *4**********************************************************************5*/678910extern void HIF_UART_EnableTXEInterrupt (void);1112L7: Enabling UART-based real-time recording.
In
main.c, insertSEGGER_UART_init(500000);before callingSEGGER_SYSVIEW_Conf();. (Also, the function prototypeextern void SEGGER_UART_init(uint32_t);)To achieve the baud rate of 500000, you need to go to the "Device Configuration Tool"
HCLK(MHz)to its maximum value, 168.[!] Note: Configuring clock and baud rate requires some calculations. Consult the MCU Reference Manual
If you are to use a different HCLK(MHz), you'll have to modify the following configurations accordingly. For example if you want the HCLK to be 50 MHz and APB1 Prescalar to be 2, then update the code as follows:
xxxxxxxxxx71/* Project/ThirdParty/SEGGER/Rec/segger_uart.c */23...4// MCU core frequency of Flasher ARM Pro V45...6// USART2 runs on APB1 clock7...
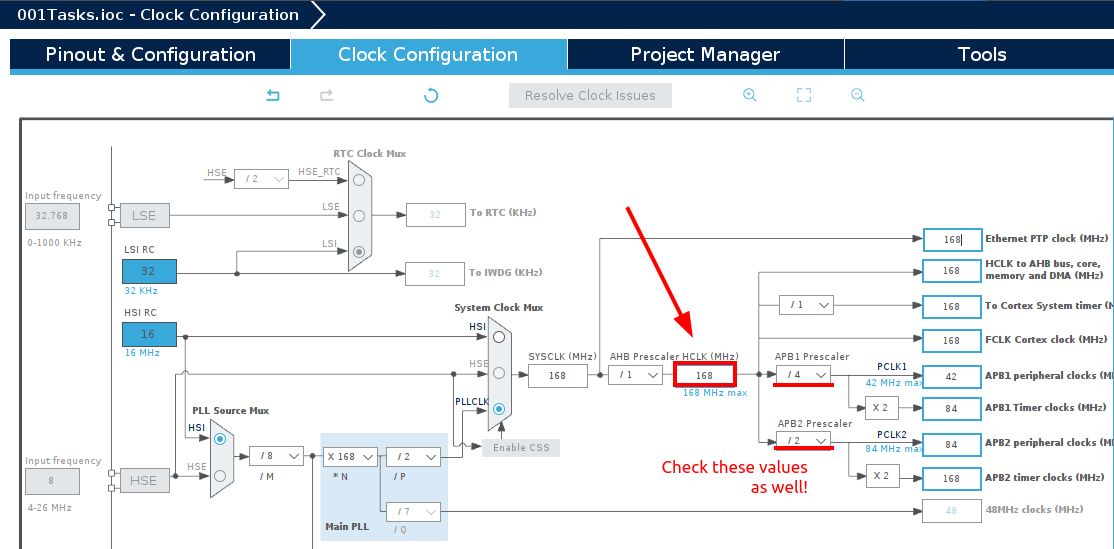
In
main.c, comment outSEGGER_SYSVIEW_Start();since now we want to call this function fromProject/ThirdParty/Rec/segger_uart.c.Don't forget this step! If you do not comment this out, you will see nothing on the SystemView window when you start recording.
Check if
#define configUSE_PREEMPTION 0(cooperative scheduling), build the project and flash it to target.Open SystemView
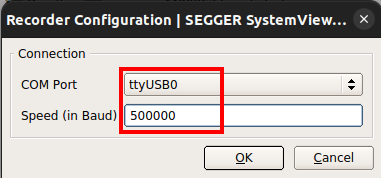
Start recording!
Note
SEGGER SystemView UART-based Recording may not work on the SEGGER SystemView software end at times. This is a known issue. If you have done everything correctly up to this point, don't worry and try the followings:
Check the wiring
Check the COM port or serial port to which the USB-to-Serial cable is connected
Close the SEGGER SystemView software
If none of these works at this point, move on to the next section. In my case, the following projects had no issue with the SEGGER SystemView UART-based Recording.
References
Nayak, K. (2022). Mastering RTOS: Hands on FreeRTOS and STM32Fx with Debugging [Video file]. Retrieved from https://www.udemy.com/course/mastering-rtos-hands-on-with-freertos-arduino-and-stm32fx/